
Scaling in and scaling out let you align position size with market-confirmed conviction while keeping total dollar risk fixed from the start. The non-negotiable rule: predefine your total position size, an explicit invalidation price, and the maximum number of adds or exits before you place the first order. Without those three parameters locked in, you are not scaling — you are improvising with increasing exposure.
This applies whether you trade crypto on Coinbase, forex pairs, or equities. The CFTC consistently flags position-sizing discipline as a core risk control for U.S. retail traders, and the 1R framework (where 1R equals the dollar amount risked on the initial probe) gives you a universal unit to measure every tranche against.
Table of Contents
- What is the difference between scaling in and averaging in?
- When does scaling in or out actually make sense?
- What do ready-to-use scaling templates look like?
- How do you size each tranche without blowing your risk budget?
- How do you execute staged orders without moving the market?
- What behavioral traps destroy scaling plans?
- How do you measure whether scaling is actually working?
- Two worked examples: scale-in pullback and scale-out breakout
- Key Takeaways
- The case for disciplined scaling over mechanical exits
- How Disciplineaiapp operationalizes your scaling plan
- Useful sources
What is the difference between scaling in and averaging in?
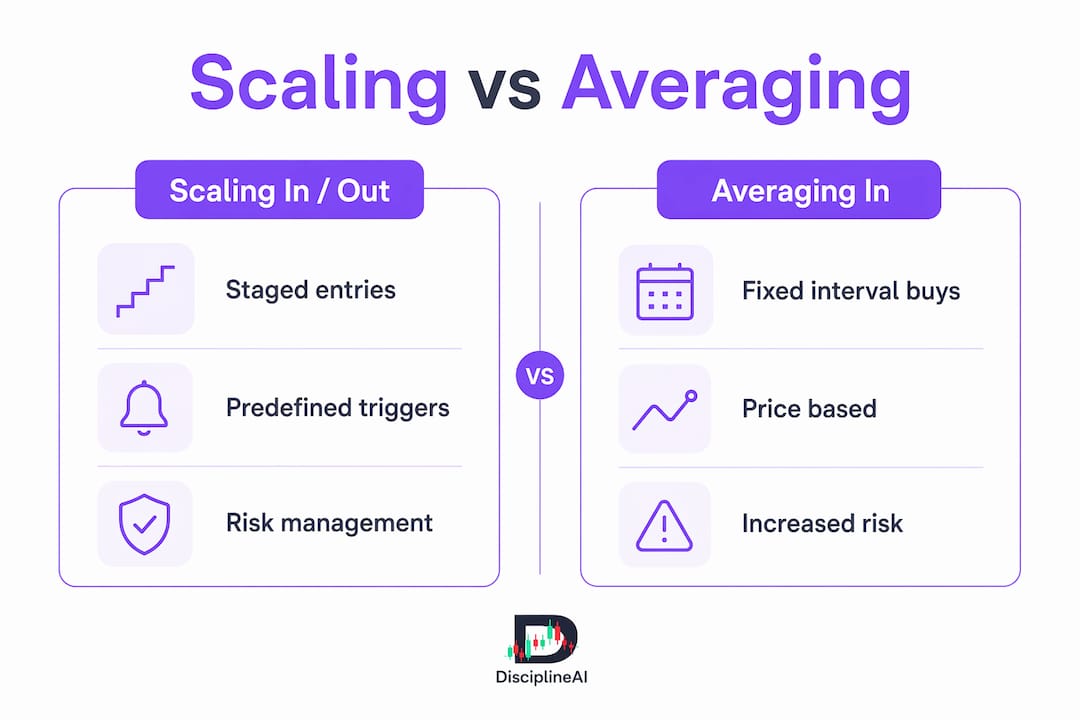
Scaling in means adding size only after the market gives you a pre-defined confirmation signal. You start with a probe sized at a portion of the intended full size, then add tranches as structure holds and conviction builds. Each add requires evidence, not just a lower price.

Averaging in is the opposite. You add because the price moved against you, hoping the trade recovers. There is no confirmation requirement, no structural evidence, and no defined stopping point. The result is a larger position in a losing idea.
How each action changes your weighted average price:
- Probe at $100, add at $102 (confirmation): weighted average = $101.20 on a 40/60 split. You paid more for the second tranche, but the market proved you right first.
- Probe at $100, add at $98 (averaging down): weighted average = $99. The price is lower, but you now hold double the size in a trade moving against you.
Scaling out means taking partial profit at pre-defined targets (TP1, TP2, TP3) rather than exiting the full position at once. When TP1 hits, you close a portion and move your stop to breakeven. The remaining position is now effectively "house money" — you have locked in a gain, and the worst outcome on the rest is a scratch.
Full exit is simpler and works well for fades or short-duration trades where holding a runner adds no edge. Partial exits suit trending markets and setups with multi-R potential.
Pro Tip: Never define your add trigger by price distance alone ("I'll add every $2 lower"). Define it by market structure: a reclaim of a key level, a volume surge, or a multi-timeframe alignment. Distance-based adds are averaging in with extra steps.
When does scaling in or out actually make sense?
Not every trade warrants staged entries or exits. Use this checklist before committing to a scale-in plan:
Conditions that justify scaling in:
- Structure has held on at least two timeframes (e.g., daily and 4H support intact)
- Order flow shows directional conviction (buy-delta above 70% on the relevant candle)
- ATR is contracting into the entry zone, suggesting accumulation rather than distribution
- Volume confirms the move, not contradicts it
- Your thesis has a clear invalidation price that is not too far from the probe entry
Conditions that justify scaling out:
- First target reached and the move has extended at least 1R from entry
- Stop moved to breakeven after TP1, converting the remainder to house money
- Trailing stop triggered on a higher-timeframe close below a structural level
When to skip scaling entirely: fast-moving news events, low-liquidity assets where slippage compounds across tranches, or any setup where your invalidation price would require a stop so wide that even the probe exceeds your per-trade risk budget.
Invalidation is non-negotiable. If the market crosses your invalidation level, the trade is dead regardless of your average entry. Define it as a specific price, not a feeling. Write it in your journal before you enter the first tranche.
Pro Tip: Multi-timeframe alignment is your highest-quality confirmation signal. Require at least two timeframes to agree before adding a second tranche — a 4H reclaim of support confirmed by a 1H close above the level is far stronger than price simply bouncing.
What do ready-to-use scaling templates look like?
Three scale-in templates and three scale-out templates cover most active-trading scenarios. Adapt tranche sizes to your asset and timeframe, but never change the stop rules mid-trade.
Scale-in templates
| Template | Tranche splits | Confirmation trigger | Stop rule |
|---|---|---|---|
| Conservative probe-confirm | 30% / 40% / 30% | Structure hold + volume confirm | Stop on full size = probe stop; tighten on each add |
| Balanced 25/40/35 | 25% / 40% / 35% | Multi-TF alignment + order flow | Constant-dollar risk: reduce stop distance as size grows |
| Aggressive two-add | 40% / 60% | Single strong confirmation | Hard stop at invalidation price; no third add allowed |
The probe sizing range of 25% to 40% of intended full size is the practitioner standard. If you go larger on the probe, you are taking on full risk before the market confirms your thesis.
Scale-out templates
- TP ladder (1/3 – 1/3 – trail): Close one-third at 1R, one-third at 2R, trail the final third. Works well in trending crypto and forex setups.
- Weighted runner: Close 50% at 1R, hold 50% for 3R or trail. Front-loads realized P&L while keeping a meaningful runner.
- Front-weighted fade: Close 70% at 0.75R, hold 30% for 1.5R. Use on mean-reversion trades where the move is likely to stall.
The TP ladder math shows that splitting a position across 1R, 2R, and 3R targets converts hit-rate distribution into long-term expectancy. A 50% win rate on TP1 combined with a 30% runner hit-rate on TP3 produces a positive expectancy even if most trades only reach the first target.
Pro Tip: For large probes in low-cap crypto or thinly traded forex pairs, use limit orders placed before the session opens rather than market orders at the moment of signal. This removes information leakage and reduces the chance of moving the market against yourself.
How do you size each tranche without blowing your risk budget?
The universal formula:
Maximum contracts = floor((Account Equity × Risk%) ÷ (Stop distance × $/tick))
Worked example for a crypto margin trade:
- Account equity: $20,000
- Per-trade risk: 1% = $200
- Stop distance on probe: $400 (price distance × contract multiplier)
- Probe size = floor($200 ÷ $400) = 0.5 BTC
When you add a second tranche, the stop tightens so total dollar risk stays at $200. If the new stop is $250 away, the combined position must not risk more than $200 total. Recalculate maximum size after every add.
Risk checklist for leverage:
- Per-trade risk: a small percentage of account equity per scale-in framework standards
- Daily risk cap: a moderate percentage of equity across all open trades
- Maximum adds per trade: limited to a few; more than that rarely adds edge and compounds slippage
- Margin check: confirm maintenance margin is not breached after the final add, especially in crypto where margin requirements shift with volatility
For forex, substitute pip value for $/tick. For stocks, substitute share price × position size. The formula is identical; only the unit changes. A leverage calculation guide can walk you through asset-specific examples if the pip-value conversion is unfamiliar.
How do you execute staged orders without moving the market?
Order type selection matters more on the add tranches than on the probe, because by the time you add, the market knows the level is contested.
Order types by scenario:
- Limit ladders: Place limit orders at each tranche level before the session. Fills are passive and do not signal intent.
- Iceberg orders: Show only a fraction of your intended size. Useful for adds in mid-cap crypto where a visible large order invites front-running.
- TWAP slices: Break a large add into time-weighted pieces. Reduces market impact on liquid assets like major forex pairs or large-cap stocks.
- Conditional limit orders: Trigger a limit order only when a structural condition is met (e.g., price closes above a level). Automates the confirmation rule without requiring you to watch the screen.
Automating tranche execution via conditional orders removes the in-trade decision entirely, which is where most execution errors happen.
Pre-execution checklist:
- Check bid-ask spread — if spread exceeds 0.3% of price, reconsider limit vs. market
- Review recent ATR — high volatility increases slippage on market orders
- Confirm market depth supports your tranche size without moving price more than 0.1%
- Verify margin availability for the maximum intended position size
Prefer limit orders in liquidity-sensitive assets. Reserve market orders for fast-moving news events where getting filled at any price beats missing the move entirely.
What behavioral traps destroy scaling plans?
Averaging into hope is the most common failure mode. The symptoms: you add a second tranche because the price dropped further, not because the market confirmed your thesis. You tell yourself the average entry is now better. Meanwhile, the position grows while the thesis weakens. The antidote is a written invalidation price reviewed before every add. Pre-planned sizing removes improvisation — when size is decided in advance, there is no in-trade negotiation.
Process mistakes that kill scaling plans:
- No defined maximum position size (adds continue until margin call)
- Confirmation rules stated vaguely ("looks strong") rather than objectively ("closes above $X on 4H")
- Stops not adjusted after adding, so total dollar risk grows with each tranche
- No written invalidation price — the trade becomes a hope trade the moment price moves against you
The psychological benefit of scaling out is real and measurable. Taking partial profit at TP1 converts the remaining position into house money. Traders who have already locked in a gain hold through volatility more rationally than those sitting on an unrealized position. Fewer emotional exits, better average hold time on runners. That behavioral edge compounds over hundreds of trades.
Pro Tip: Pre-place your TP1 limit order and your adjusted stop simultaneously when you enter the trade. You should have nothing left to decide mid-trade. Automation tools and plugin-based conditional orders can handle this execution layer so you never face the temptation to override your plan.
Also worth reading: types of trading discipline failures and how to avoid overtrading crypto markets — both address the behavioral patterns that undermine scaling discipline.
How do you measure whether scaling is actually working?
Tracking the right metrics separates traders who improve from those who repeat the same mistakes.
Core metrics to track per completed scale trade:
- Risk-adjusted expectancy: average R per trade across all tranches combined
- Win rate by tranche: what percentage of probe entries reach TP1, TP2, TP3
- Slippage per tranche: actual fill price vs. intended price, in R terms
- Runner hit-rate: how often the final tranche reaches TP2 or TP3
- Average R on completed trades: benchmark against your non-scaled trades to verify the approach adds edge
Journal entry fields for scale trades:
- Entry time and price for each tranche
- Tranche size as a percentage of full intended position
- Confirmation evidence cited at the time of each add (not after)
- Execution quality score: fill vs. target price
- Exit prices and realized R per tranche
- Post-trade note: did the invalidation price hold? Did you follow the plan?
Disciplineaiapp's automated journaling captures tranche-level execution data and generates trade autopsies that flag where your scaling plan diverged from execution. The platform's AI trade analysis surfaces confidence scores at each decision point, giving you objective evidence of whether the confirmation signal was present when you added.
Actionable rule: review scaling trades weekly. Run a Monte Carlo simulation or walk-forward analysis monthly to verify that your tranche templates remain robust across different market regimes, not just the recent sample.
Two worked examples: scale-in pullback and scale-out breakout
Example A: Scale-in into a pullback (crypto, BTC/USD)
Setup: BTC pulls back to a 4H support zone at $95,000. Thesis is long; invalidation at $93,500.
| Tranche | Price | Size | Stop | Dollar risk |
|---|---|---|---|---|
| Probe (30%) | $95,000 | 0.3 BTC | $93,500 | $450 |
| Add 1 (40%) | $95,400 | 0.4 BTC | $94,000 | $600 |
| Add 2 (30%) | $95,800 | 0.3 BTC | $94,000 | $400 |
Weighted average entry: (0.3 × $95,000 + 0.4 × $95,400 + 0.3 × $95,800) ÷ 1.0 = $95,400
Each add required a structural confirmation (4H close above the prior swing high). The stop tightened on each add so total dollar risk on the full position stayed near $450 — the probe's original risk. TP1 at $97,800 (approximately 2R from average entry), TP2 at $99,200.
Example B: Scale-out on a breakout (forex, EUR/USD)
Setup: EUR/USD breaks above 1.0850 with volume. Entry: 1.0850, full size 3 lots, stop at 1.0810 (40 pips).
| Tranche | Exit price | Size closed | Realized pips | Realized R |
|---|---|---|---|---|
| TP1 (33%) | 1.0893 | 1.0 lots | 40 pips | 1R |
| TP2 (33%) | 1.0935 | 1.0 lots | 70 pips | 2R |
| Runner (34%) | 1.0967 (trail) | 1.0 lots | 100 pips | 3R |
After TP1, stop moved to breakeven (1.0850). After TP2, trailing stop set 30 pips below the most recent swing high. Blended R on the full trade: (0.33 × 1R) + (0.33 × 2R) + (0.34 × 3R) = 2R average.
Key calculation to replicate: multiply each tranche's weight by its R outcome, then sum. That blended R is your true expectancy per trade, not the R on any single exit.
Key Takeaways
Scaling in and scaling out only improve performance when every tranche is governed by pre-defined parameters — confirmation rules, constant-dollar risk, and a written invalidation price.
| Point | Details |
|---|---|
| Predefine before entry | Lock in total size, invalidation price, and max adds before placing the first order. |
| Constant-dollar risk | Tighten stops on each add so total dollar risk never grows beyond the probe's original risk. |
| Confirmation-only adds | Every add requires objective market evidence, not a lower price or a gut feeling. |
| Measure blended R | Track each tranche separately; calculate blended R to verify scaling adds expectancy. |
| Disciplineaiapp integration | Use Disciplineaiapp's confidence scores, automated journaling, and execution analytics to validate tranche decisions and surface behavioral patterns. |
The case for disciplined scaling over mechanical exits
Most traders who struggle with scaling are not failing at math. They are failing at commitment. The probe-confirm-add framework works precisely because it forces you to wait for the market to agree with you before you increase your bet. That waiting is uncomfortable. The price moves, you are underweight, and the temptation to chase full size is real.
What changed my own approach was treating the confirmation signal as a hard gate, not a suggestion. If the 4H close does not reclaim the level, the add does not happen. Period. That single rule eliminates most of the averaging-into-hope mistakes that quietly destroy accounts over months.
The same discipline applies to exits. Traders who pre-place their TP1 order and stop adjustment before the trade opens make better decisions on the runner than those who watch price tick by tick and decide in real time. The house-money effect is genuine — once you have locked in a gain, the remaining position feels different, and you hold through volatility you would otherwise exit prematurely.
Where AI confidence scores fit: require a minimum score threshold from Disciplineaiapp plus structural evidence before adding a second tranche. If the AI's confidence drops between your probe and your planned add, that is a signal worth respecting. The combination of quantitative evidence and pre-defined structural rules is more reliable than either alone.
How Disciplineaiapp operationalizes your scaling plan
Knowing the templates is one thing. Executing them without deviation, across dozens of trades, in real market conditions, is another problem entirely.
Disciplineaiapp is built for exactly that gap. The platform delivers AI-generated trade setups with confidence scores that map directly onto tranche triggers — you see the evidence quality before you add, not after. The built-in position-sizing calculator handles the constant-risk math automatically, so you never need to recompute stop distances mid-trade. Execution quality scoring grades each fill against your plan, and automated journaling captures every tranche with timestamps and confirmation evidence.

The trade autopsy feature surfaces where your scaling execution diverged from your pre-defined rules, giving you the feedback loop that turns a good template into a repeatable edge. For traders who want to validate their scaling templates before going live, the crypto risk management resources and paper trading mode let you run the full tranche framework without real capital at risk.
See the full feature set and start your trial at Disciplineaiapp features.
Useful sources
- Scale In: Building Position Size Through Confirmation — NexusFi Academy: primary reference for probe sizing percentages (25–40%), per-trade risk ranges, and constant-risk rules when adding tranches.
- How I Scale Into Trades — tastylive: practitioner walkthrough of the structured scale-in approach, including invalidation rules and pre-planned sizing.
- Partial Profit Taking Explained — HeyGoTrade: covers the behavioral benefit of TP1 exits and the house-money effect on runner management.
- Take Profit Ladder — KenMacro: explains TP1/TP2/TP3 math and how hit-rate distribution converts into long-term expectancy.
- What Is Scaling? — TradingFinder: foundational overview of predefined parameters required for professional scaling.
- Partial Profit Taking vs. Full Take Profit — ActivTrades: compares partial and full exit strategies across different market environments.
- Scale In — Investopedia: standard reference definition of scale-in and scale-out mechanics.
- Plugin Automation Ideas for Traders — Scalping Algo: execution tactics including iceberg orders, TWAP slices, and conditional limit orders for staged entries.
- Discipline AI Process: describes how Disciplineaiapp's confidence scoring, execution analytics, and automated journaling operationalize scaling templates.