
Confluence trading means risking capital only when multiple independent reasons point to the same price at the same time. One signal is a guess. Two correlated signals are still a guess wearing a disguise. Three or more genuinely independent witnesses — drawn from different evidence families — start to build a real edge.
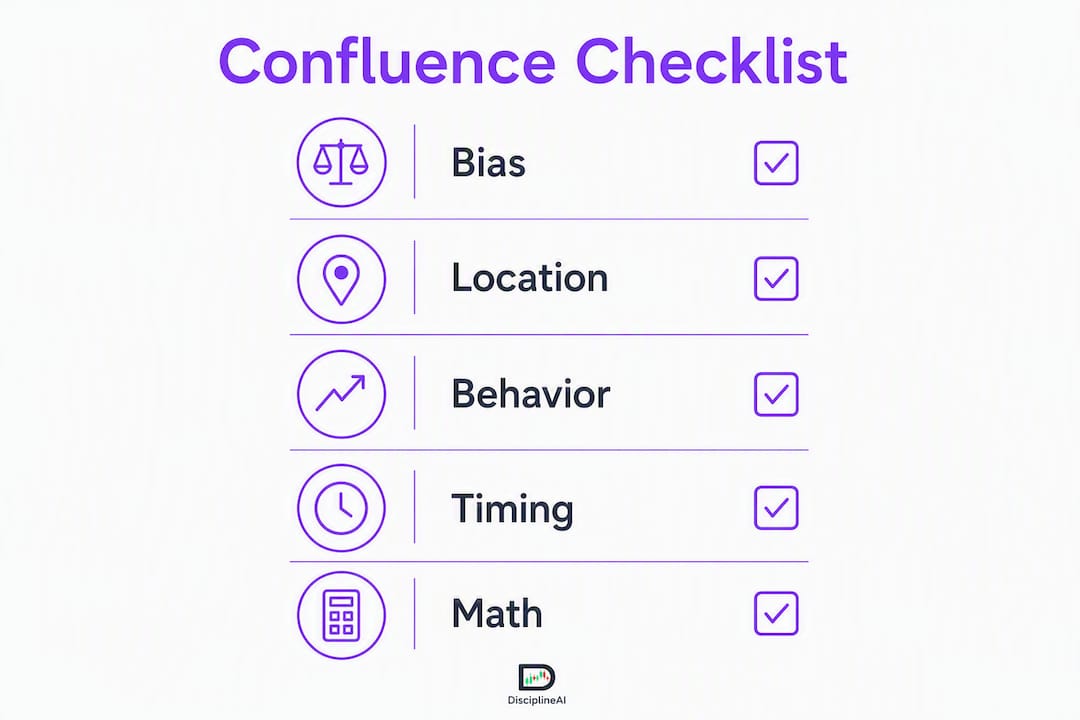
Here is the 4-step gate checklist you can run on any chart right now:
- Bias: Does the higher-timeframe trend support the trade direction? If not, stop here.
- Location: Is price at a meaningful level — a stacked support/resistance zone, an order block, a Fibonacci area?
- Behavior: Is price reacting at that level? Look for a liquidity sweep, a wick, a change of character.
- Timing: Has a trigger confirmed the move — a breakout, a retest, a bullish or bearish CHoCH?
Run all four gates in order. Fail one early gate and the trade is disqualified — no exceptions, no rationalization.
Table of Contents
- What confluence trading actually means (and why independence is everything)
- Why stacking independent evidence improves your decisions
- Which indicators and patterns work as independent witnesses
- How to build a confluence checklist you can run on every chart
- Two example setups that show the checklist in action
- Common mistakes that kill confluence setups (and how to fix them)
- How to attach risk rules to every confluence setup
- How Disciplineaiapp maps to the confluence checklist
- Key Takeaways
- The part most traders skip
- Disciplineaiapp brings the checklist to life
- Useful sources for deeper study
What confluence trading actually means (and why independence is everything)
Confluence in trading means multiple independent pieces of evidence pointing to the same price. The word "independent" is doing all the work in that sentence. Two signals that agree because they are built on the same math are not two witnesses — they are one witness speaking twice.
The clearest example: RSI, Stochastic, and MACD all flashing bullish at the same moment. That feels like three confirmations. It is not. All three are momentum oscillators derived from the same price series, so they move together by design. Stacking them adds noise, not evidence.
True confluence draws from separate evidence families:
- Market structure: Is the higher-timeframe trend up, down, or ranging? What does the most recent swing high/low pattern say?
- Location: Where are the key levels — prior support/resistance, order blocks, Fibonacci retracements, session highs/lows?
- Liquidity: Has price swept a liquidity pool? Is there a visible wick through a prior swing that grabbed stops?
- Timing/trigger: Has a change of character (CHoCH), a breakout, or a confirmed retest signaled that the move is starting?
- Participation: Is volume, cumulative volume delta (CVD), or open interest rising in the direction of the trade?
BabyPips frames confluence as the point where two or more structures meet to form a higher-probability zone. That framing is useful for entries and targets, but it undersells the independence requirement. A zone where three Fibonacci levels overlap is still one family of evidence — location. Add a higher-timeframe trend and a liquidity sweep, and now you have three genuinely different witnesses.
Why stacking independent evidence improves your decisions
The practical benefit of a confluence-based approach is not just a higher win rate. It changes the nature of the decision itself — from "I think this might work" to "three independent things agree, and here is my stop if they are all wrong."
Confluence improves decision-making and risk management but does not guarantee profits. The honest version: it raises probability and forces you to define your stop before you enter, which is where most retail traders actually lose money — not on the trade itself, but on the sizing and the exit.
The behavioral benefit is underrated. A minimum-factor rule removes impulsive entries. If you require three independent witnesses before risking capital, you will automatically skip the marginal setups that feel compelling in the moment but have no structural backing. Confluence's main value is often the trades it prevents you from taking.
Practical benefits when you apply it consistently:
- Fewer low-quality entries, which reduces overall variance
- Clearer stop placement because the trade has a structural reason to be wrong
- Better reward-to-risk math because you enter at a defined level with a defined invalidation
- Psychological discipline because the checklist makes the decision, not your mood
Pro Tip: Set a minimum of three independent witnesses before sizing a trade at full risk. Treat higher-timeframe bias as mandatory — if the daily trend disagrees, no amount of lower-timeframe confluence overrides it.
The common guideline among price-action and smart-money traders is to aim for three or more independent factors before risking capital. Five or more is a premium setup, but those are rare. Three to four factors balances selectivity with enough opportunity to actually trade.
Which indicators and patterns work as independent witnesses
The goal is one tool per evidence family, not more tools from the same family. Here is a practical taxonomy:
Direction / market structure Higher-timeframe trend (daily or weekly), swing structure (higher highs/higher lows or the reverse), and moving averages used as trend filters rather than entry signals. Pick one structural read and commit to it.
Location / levels Confluence zones where multiple levels overlap — a daily support, a prior breakout point, and a Fibonacci retracement sitting in the same area — produce cleaner reactions because multiple participant groups are watching the same price. Order blocks and fair value gaps belong here too.

Liquidity / order flow Liquidity sweeps (price running stops above a prior high before reversing), wicks through key levels, and visible absorption on the tape. These tell you that the market has cleared weak hands before the real move begins.
Timing / triggers A change of character (CHoCH), a breakout and retest, or a candlestick pattern at a key level after a liquidity sweep. The trigger is the gate that says "now" — not "this level looks interesting."
Participation metrics Order flow, CVD, and open interest as an independent witness to show real money behind a move. A bullish candle on rising CVD at a key level is a different animal from a bullish candle on flat or declining CVD.
Correlated pairs to avoid:
- RSI + Stochastic (both momentum oscillators, same math)
- EMA 20 + EMA 50 + EMA 200 as three separate "confirmations" (all moving averages, same family)
- MACD + RSI + CCI (all derived from price momentum — one family, three echoes)
Pro Tip: Limit your live stack to one tool per evidence family — three or four families total. More than that and you will spend your decision time managing indicators instead of reading price.
How to build a confluence checklist you can run on every chart
The gate framework works as an ordered sequence. Failing an early gate disqualifies the trade. You do not skip ahead to look for a trigger if the bias is wrong. Here is the full workflow:
Gate 1: Bias Decision rule: What is the higher-timeframe trend? Use the daily chart for swing trades, the 4H or 1H for intraday setups. Pass: Price is in a clear trend and your trade direction aligns with it. Fail: Trend is against you or structure is ambiguous. Stop here.
Gate 2: Location Decision rule: Is price at a meaningful level — a stacked zone, an order block, a Fibonacci area in discount (for longs) or premium (for shorts)? Pass: Two or more location factors overlap at the same price. Fail: Price is mid-range with no structural reason to react. Stop here.
Gate 3: Behavior Decision rule: Is price reacting at the level? Look for a liquidity sweep, a wick, a rejection candle, or a CHoCH on a lower timeframe. Pass: Visible reaction with evidence of absorption or reversal. Fail: Price is drifting through the level with no reaction. Stop here.

Gate 4: Timing / trigger Decision rule: Has a specific trigger confirmed the entry — a retest of a broken level, a CHoCH, a breakout with volume? Pass: Clear trigger present. Fail: No trigger yet. Wait or skip.
Gate 5: Execution math Decision rule: Where is the stop (below/above the structural level that invalidates the trade)? What is the position size at your fixed risk percentage? Is the reward-to-risk at least 2:1? Pass: All three numbers are defined before you click. Fail: You cannot define the stop or the math does not work. Skip the trade.
Graded sizing by gates passed:
- 5 gates pass: full position size
- 4 gates pass: 75% of normal size
- 3 gates pass: 50% or a small test position
- Fewer than 3: no trade
What to log in your trade journal for each setup:
- Which gates passed and which failed
- The specific evidence for each gate (e.g., "daily uptrend, 61.8% Fib + order block, liquidity sweep with wick, CHoCH on 15m")
- Entry price, stop price, target price, and position size
- Outcome and whether the gate that failed (if any) predicted the loss
Top-down, multi-timeframe analysis is the structural backbone of this framework. Start on the daily or weekly for bias, drop to the 4H for location, and use the 1H or 15m for behavior and trigger. The timeframes shift depending on your style, but the gate order stays the same.
Two example setups that show the checklist in action
Example 1: Swing long on a pullback to stacked support
- Bias (daily): Price is making higher highs and higher lows. Daily trend is up. Gate 1 passes.
- Location (daily/4H): Price has pulled back to a zone where the 61.8% Fibonacci retracement, a prior breakout level, and a 4H order block all sit within 30 points of each other. Gate 2 passes.
- Behavior (4H/1H): Price sweeps below the prior swing low (liquidity sweep), then closes back above it with a long wick. CVD turns positive on the sweep candle. Gate 3 passes.
- Trigger (1H): A bullish CHoCH forms on the 1H — price breaks above the most recent lower high, confirming the reversal. Gate 4 passes.
- Execution: Stop placed below the wick low (structural invalidation). Target 1 at the prior swing high (1:2 R:R), Target 2 at the daily swing high (1:4 R:R). Position sized at 1% of account risk. Gate 5 passes.
Key execution details:
- Entry: on the CHoCH retest
- Stop: below the liquidity sweep wick
- Target 1: prior swing high (partial close, 50% of position)
- Target 2: daily swing high (remainder)
- Move stop to breakeven after Target 1 is hit
Example 2: Intraday short at a premium zone
- Bias (4H): 4H structure is bearish — lower highs and lower lows. Gate 1 passes.
- Location (4H/1H): Price has rallied into a 4H premium zone where a prior order block and the 70.5% Fibonacci retracement overlap. Gate 2 passes.
- Behavior (1H/15m): Price shows a bearish rejection candle at the zone. CVD is declining on the push into the level, signaling that buyers are not backing the move. Gate 3 passes.
- Trigger (15m): A bearish CHoCH on the 15m confirms the short. Gate 4 passes.
- Execution: Stop above the order block high. Target 1 at the nearest 15m swing low (1:2 R:R). Position sized at 0.75% of account (4 gates, reduced size). Gate 5 passes.
Key execution details:
- Entry: on the 15m CHoCH confirmation
- Stop: above the order block high
- Target 1: nearest 15m swing low (partial close)
- Target 2: 4H demand zone below
The same gate sequence applies whether you are trading a daily swing or a 15-minute scalp. The timeframes compress, but the logic stays identical: bias, location, behavior, trigger, math.
Common mistakes that kill confluence setups (and how to fix them)
Stacking correlated indicators The fix: audit your current indicator stack. If two tools are both momentum oscillators or both moving averages, remove one. Keep one tool per evidence family.
Hunting for confluence after you have already decided to enter This is confirmation bias in its purest form — you find the trade first, then collect reasons to justify it. The fix: run the gates in order, before you form an opinion. If you catch yourself working backward, close the chart and reset.
Ignoring reward-to-risk A five-factor setup with a 1:1 R:R is not a good trade. The fix: Gate 5 (execution math) is non-negotiable. If the math does not work, the setup does not exist.
Chasing perfection and missing real setups Waiting for five independent factors on every trade means you will trade rarely. The fix: three factors at reduced size is a valid trade. Define your minimum threshold and stick to it.
Over-trading rare premium setups The inverse problem: sizing full on every five-factor setup without checking whether the market regime supports it. The fix: add a regime filter (trending vs. ranging) to Gate 1.
Red flags that signal false confluence:
- All confirming signals are from the same indicator family
- The "level" is a round number with no structural backing
- Behavior gate passed only because price touched the level, not because it reacted
- Trigger appeared on a timeframe too small to be meaningful for the trade size
Recovery action for each: go back to Gate 1 and re-run the sequence with fresh eyes. If you cannot articulate the evidence for each gate in one sentence, the confluence is not real.
How to attach risk rules to every confluence setup
Position sizing is where confluence pays off or falls apart. The gate framework gives you a structural stop — the price level that, if hit, proves the trade thesis wrong. That stop distance, combined with a fixed percentage of your account, determines your position size. A 1% account risk rule with a 30-pip stop produces a different lot size than a 1% rule with a 10-pip stop. The math is automatic once you define the stop first.
Practical risk rules tied to the checklist:
- Stop placement: always below/above the structural level that invalidates the trade (the wick low, the order block edge, the CHoCH origin). Never use arbitrary tick distances.
- Position sizing: fixed percentage of account (most retail traders use 0.5%–2% per trade). Reduce size when fewer gates pass.
- Scaling out: take partial profit at Target 1 (first structural level), move stop to breakeven, let the remainder run to Target 2.
- Breakeven rule: move stop to entry after Target 1 is hit — this removes the possibility of a winner turning into a loss.
- Journal entries: log gate results, entry/stop/target, and outcome. Review weekly to check whether your confluence rules are actually improving your edge metrics (win rate, average R:R, expectancy).
Pro Tip: Predefine a forced stand-aside rule: if price reaches your entry level but the behavior gate has not passed (no reaction, no sweep, no CHoCH), you do not enter. The level alone is not enough. Wait for the behavior.
Trading performance analytics let you verify whether your confluence rules are working — not by feel, but by tracking expectancy and execution quality across a statistically meaningful sample of trades. Thirty trades is a minimum; one hundred is where patterns become reliable.
How Disciplineaiapp maps to the confluence checklist
Running the gate framework manually on every chart is possible, but it is also where emotional shortcuts creep in. Disciplineaiapp is built to automate the parts of the checklist that are most vulnerable to bias.
Here is how the platform's features map to each gate:
- Gate 1 (Bias): Multi-timeframe trend detection scans across daily, 4H, and 1H simultaneously and flags alignment or conflict.
- Gate 2 (Location): Market structure detection identifies order blocks, premium/discount zones, and key levels across timeframes.
- Gate 3 (Behavior): Liquidity sweep alerts flag when price has run stops and reversed, reducing the chance of entering before the sweep.
- Gate 4 (Trigger): CHoCH and breakout detection signals when a confirmation trigger has formed.
- Gate 5 (Execution): Built-in position sizing and leverage calculators predefine the math before you click. The stand-aside protection feature flags setups that fail gate order during live price action.
Beyond the gates, the AI confidence score gives each setup a composite rating based on how many independent factors align — effectively a numeric version of the graded sizing rule. The automated trade journal logs gate results, entry/stop/target, and outcome, then feeds the AI trade autopsy to show you which gate failures predicted your losses.
Pro Tip: Use the behavioral coaching feature to track whether you are skipping gates under pressure. The pattern data will show you exactly which gate you tend to rationalize — and that is the one to watch.
The market replay simulation with fog-of-war lets you practice the gate sequence on historical data without knowing the outcome in advance. That is the closest thing to live-trade pressure without real capital at risk.
Key Takeaways
Confluence trading works because independent evidence from multiple families raises the probability of a setup succeeding, while the gate framework enforces discipline by disqualifying trades that fail early criteria.
| Point | Details |
|---|---|
| Independence is mandatory | Signals from the same indicator family (RSI + Stochastic) are one witness, not two — true confluence requires separate evidence families. |
| Gate order matters | Run Bias → Location → Behavior → Timing → Execution in sequence; failing an early gate disqualifies the trade regardless of later agreement. |
| Three witnesses minimum | Aim for three or more independent factors before sizing a trade; fewer than three is a guess, not a setup. |
| Risk math completes the setup | Predefine stop placement, position size, and reward-to-risk before entry — confluence without execution math is incomplete. |
| Disciplineaiapp automates the gates | Multi-timeframe bias detection, liquidity sweep alerts, CHoCH signals, confidence scores, and automated journaling map directly to each gate in the checklist. |
The part most traders skip
The gate framework is not complicated. Bias, location, behavior, timing, math. Five gates, run in order, every time. What makes it hard is not the logic — it is the discipline to stop at Gate 1 when the bias is wrong, even when everything else looks perfect on the lower timeframe.
The trades that hurt most are not the ones where the setup was weak. They are the ones where the setup looked strong on the entry timeframe but the daily trend was quietly pointing the other way. That is the gate most traders skip under pressure, because the lower-timeframe picture is vivid and immediate, and the daily trend feels abstract until it is not.
Treating confluence as a trade qualification tool rather than a prediction tool changes the psychology entirely. You are not trying to be right. You are trying to take trades where the evidence justifies the risk. When a trade loses despite all five gates passing, that is not a failure of the system — it is the variance that the system already accounted for in your position size. Log it, review it, and move on.
The traders who get the most out of a confluence framework are the ones who journal obsessively. Not because journaling is pleasant, but because the data eventually shows you which gates you skip, which evidence families you over-weight, and which setups have genuine edge in your specific markets. Without that feedback loop, you are running the checklist on faith.
Disciplineaiapp brings the checklist to life
Running five gates manually on every chart is where most traders start cutting corners — not because they do not understand the framework, but because the pressure of live price action makes it easy to rationalize skipping a gate. Disciplineaiapp removes that pressure by automating the checks that are hardest to run objectively under stress.

The platform scans for multi-timeframe bias alignment, flags liquidity sweeps and CHoCH triggers in real time, calculates position size before you enter, and logs every trade with gate-level detail for post-session review. The AI confidence score gives you a composite read on how many independent factors align — so you know whether you are looking at a three-factor setup at reduced size or a five-factor setup worth full risk. The stand-aside protection feature will flag a setup that fails gate order during live action, which is exactly the moment most traders override their own rules.
If you want to see how the gate framework works inside a live tool, explore the full feature set and run your next setup through it before risking capital.
Useful sources for deeper study
- Confluence in Finance: Definition, Overview, and Practical Applications — Investopedia's grounded take on what confluence does and does not guarantee.
- Confluence Definition by BabyPips — a clean, accessible definition useful for traders new to the concept.
- CHoCH Trading Strategies and Techniques — detailed guide to using change-of-character signals as timing triggers in the gate framework.
- What Is Trading Behavior Analysis — explains how volume and participation measures work as independent witnesses in the behavior gate.